
When it comes to starting from scratch it can be very difficult o decide where exactly to start, in the past I would get stuck in the early stages of development and struggle to decide between different options. For this reason, I decided to just get some paint on the canvas so to speak.
I imagined a scene involving a stone pathway and a small pond beside, since the theme is medieval I wanted this scene to act as a ‘hero’s journey’, I also didn’t want to draw too much inspiration from references as I didn’t want those images to affect how I would compose the scene. Therefore that simple description was all that was necessary in order to start creating this scene and from that point, I would be able to elaborate on the scene with whatever felt appropriate, without encroaching back on what I had already completed.
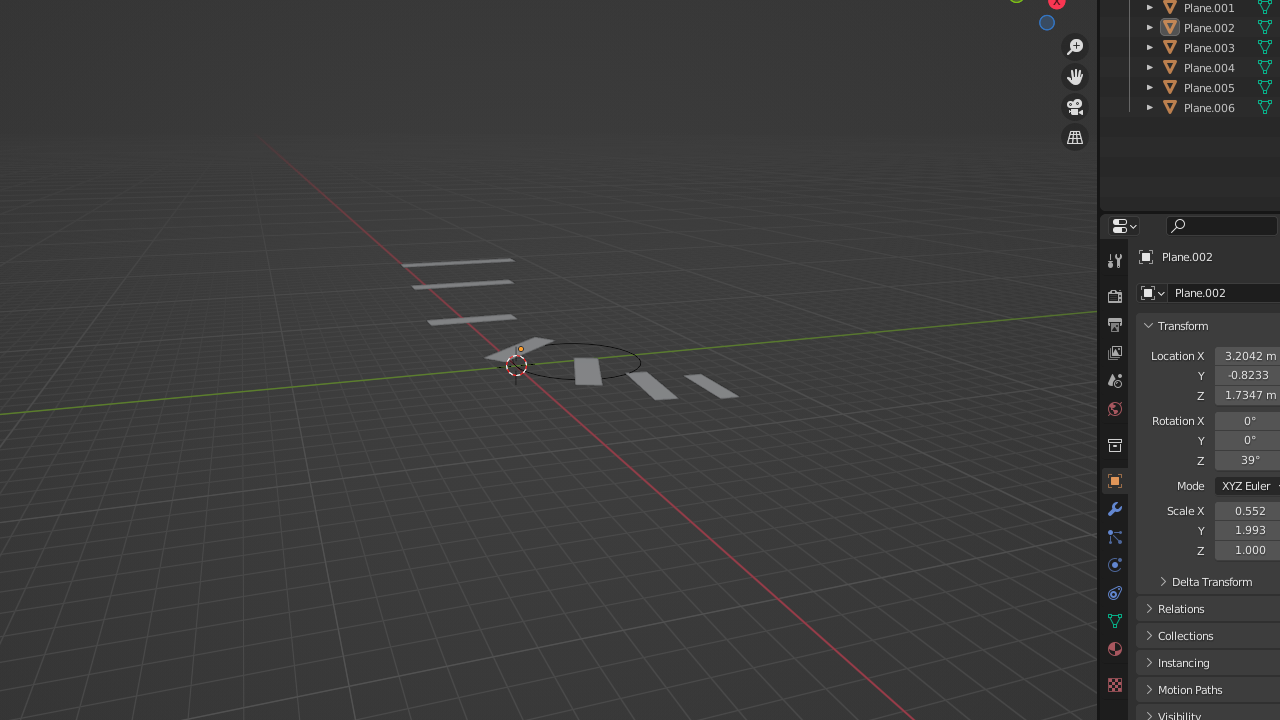
To start I simply created a circle that would act as the location of the pond (I will refer to these simple objects as placeholders or what they will eventually be from now on). I then placed some planes in a formation around the pond increasing in size to imply its direction forward. Along with this, I added some incline to the path as I decided it would look better as a stairway.
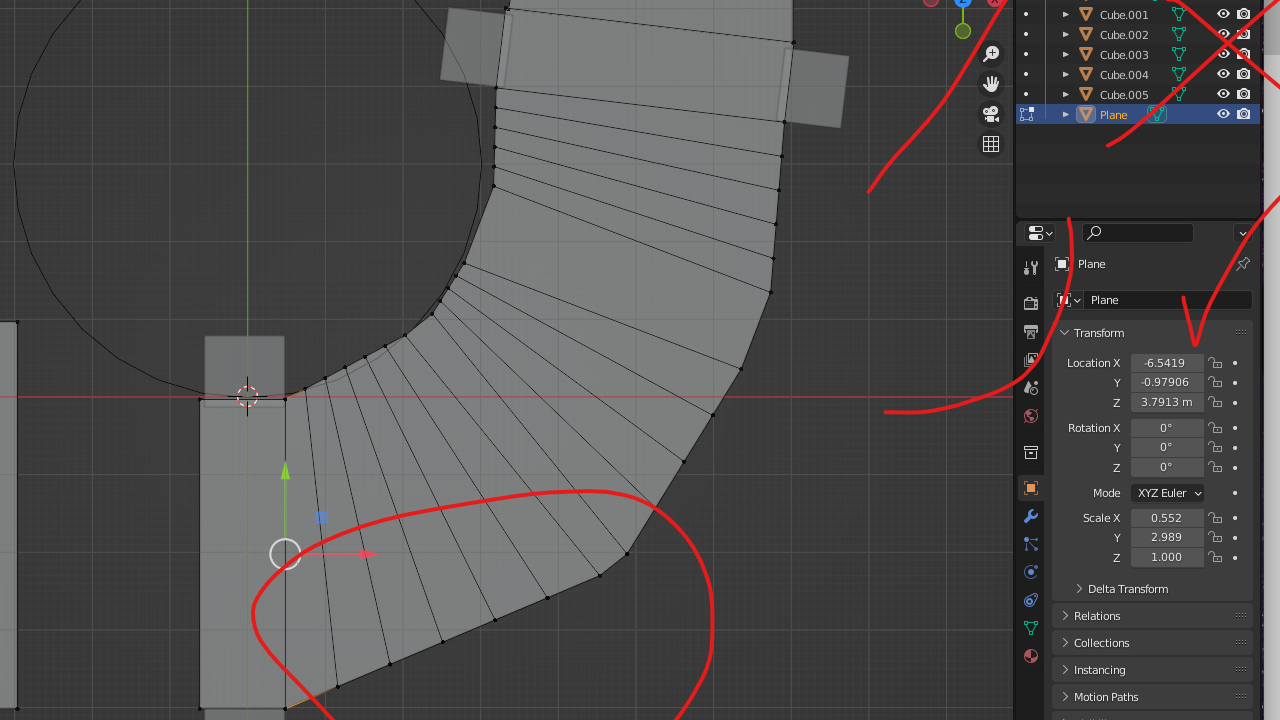
At this point I connected the planes together and added some loop cuts creating more lines for more points of articulation, this would be useful as, at first I wasn’t satisfied with the shape of the path as it looked too blocky as you can see above, whereas I wanted it to be more fluid and rounded, as to mirror the pond. I would also add some blocks that would over time develop into low stone walls.
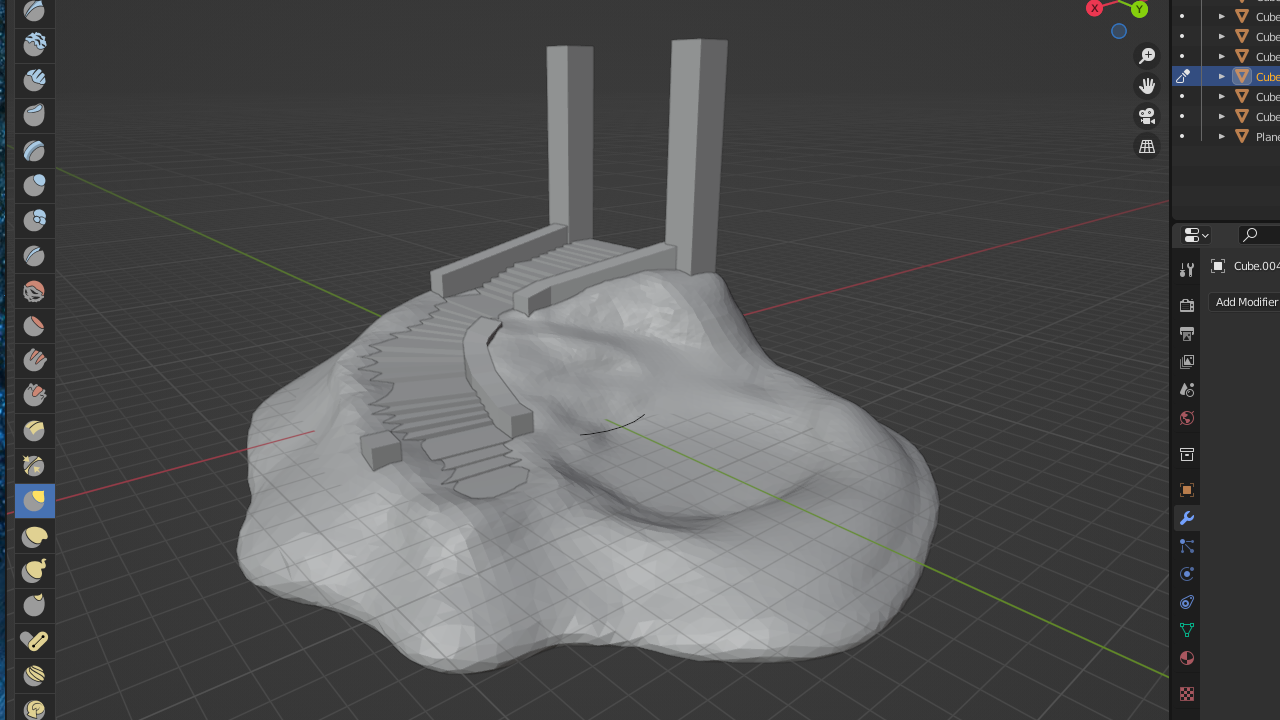
I now started to add some ground to the scene, for this I started with a simple cube and then used sculpt mode, with dynamic topology and the basic draw brush, to expand out the cube into the shape you can see above. I also added some more fencing to the sides of the path as it helps better illustrate the direction of the path especially when the scene is more densely populated. At the end of the path I planned to have some type of gateway however, I had not yet fully decided therefore for the time being I would just have two large pillars.
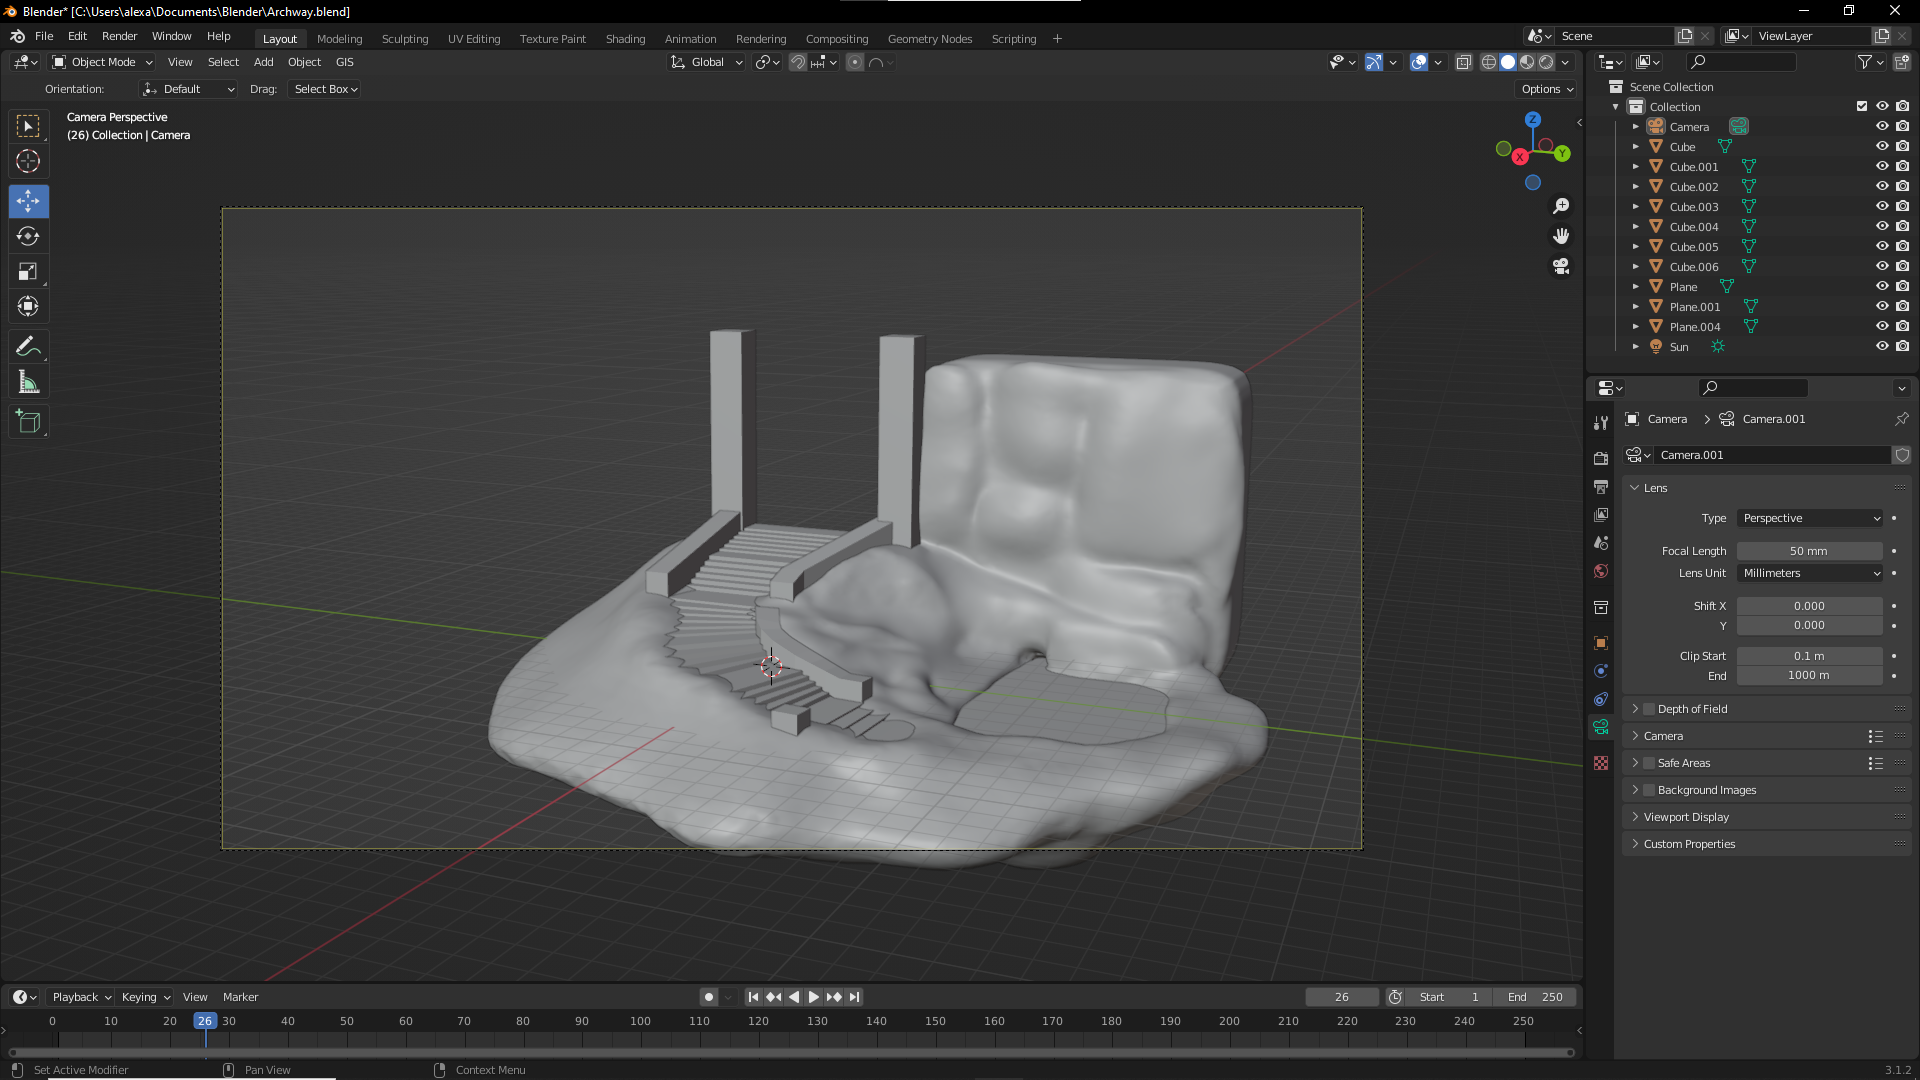
I also want to mention how the placement of the camera was important during this creative process. In order to create a visually appealing scene within a time limit it is important to not be too complex therefore by using a predefined perspective (open to some change) I am able to create assets and an environment with more detail on the viewing side and avoid wasting time on detail that will be obscured.
The next step involved filling in the pond and further experimenting with the setting. I added a stone wall to the back of the scene using the same methods I did to create the floor, I made sure to take into account how the pond flows in and out of the area by adding the opening at the bottom. For the pond, I just used a plane and would rely on its material nodes to make it look more realistic.
In Blender you can create materials using the shader editor, this provides you with many different nodes that can allow for many different unique properties to be applied to the object. As with many parts of Blender, I am still trying to learn this editor therefore this part of the development process took a lot of back and forth and testing to find out what works.
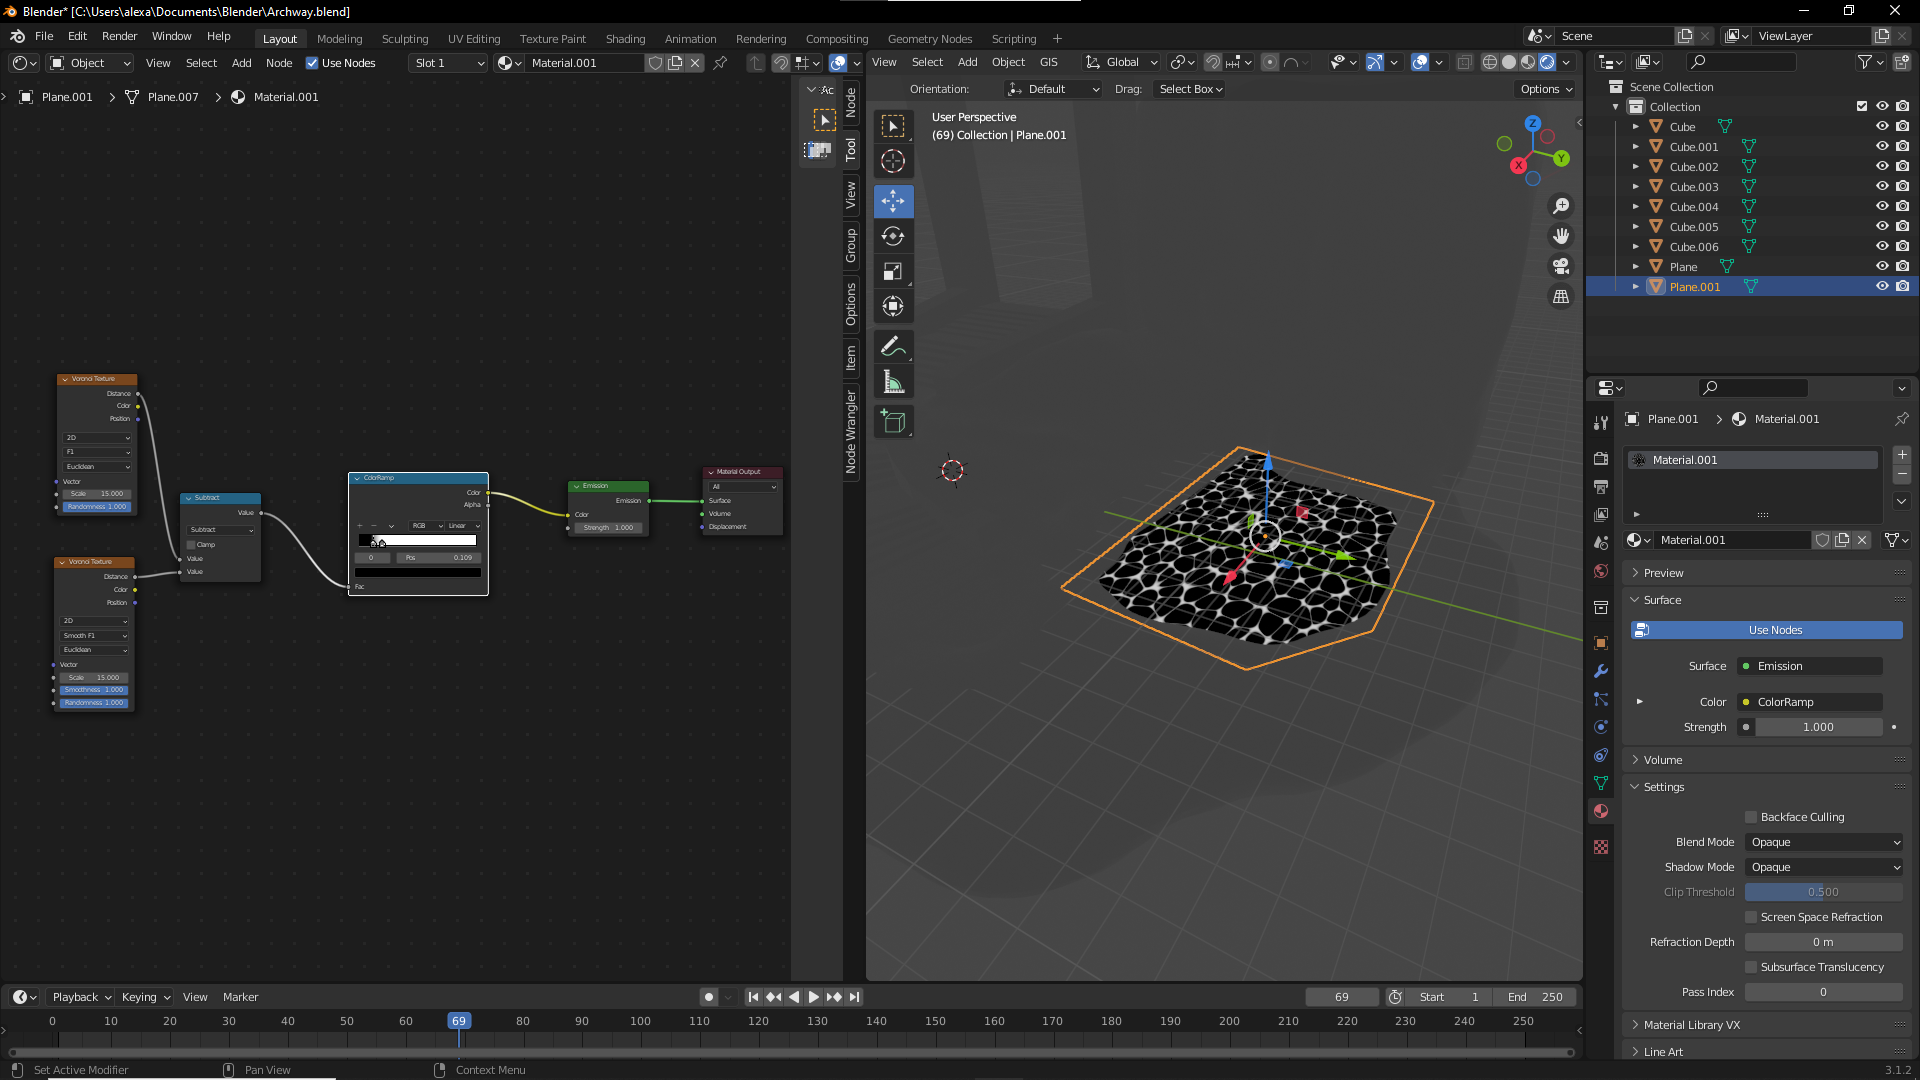
I knew to start I would want some patterns to create something akin to spume, therefore I tried some of the different texture nodes and quickly worked out that a Voronoi texture would be the best. by combing two Voronoi nodes together with the subtract node I could create the varied sizes of the black dots and with the colour ramp, I could make the shades less faded.
At this stage, I had a good basis for the material but I wanted to add some more detail so I expanded upon this node arrangement. Below is the improved node setup from left to right.
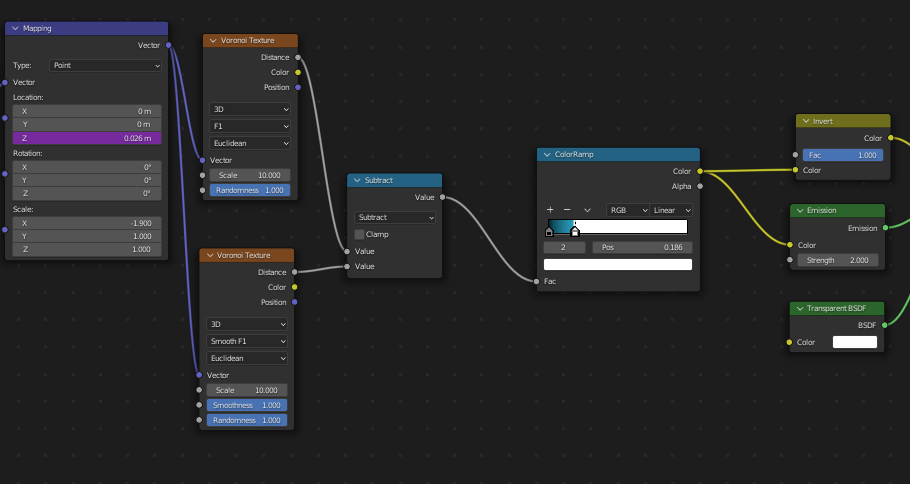
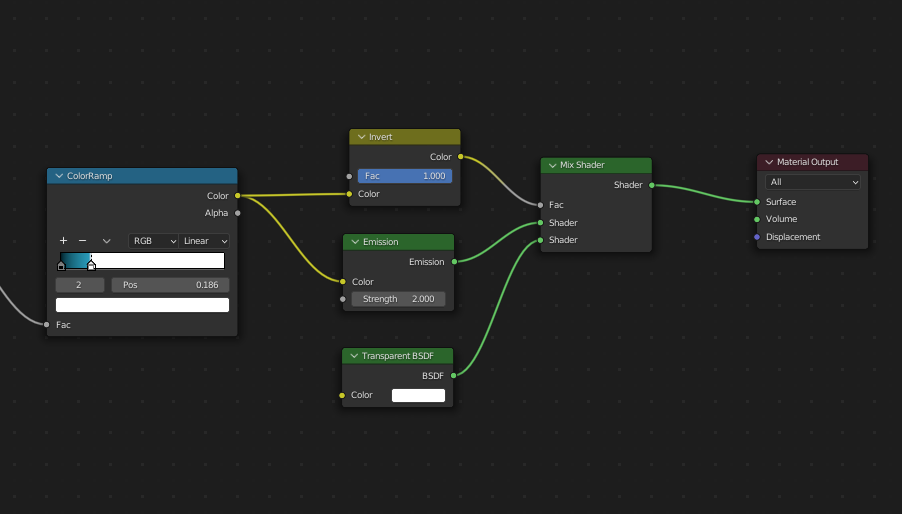
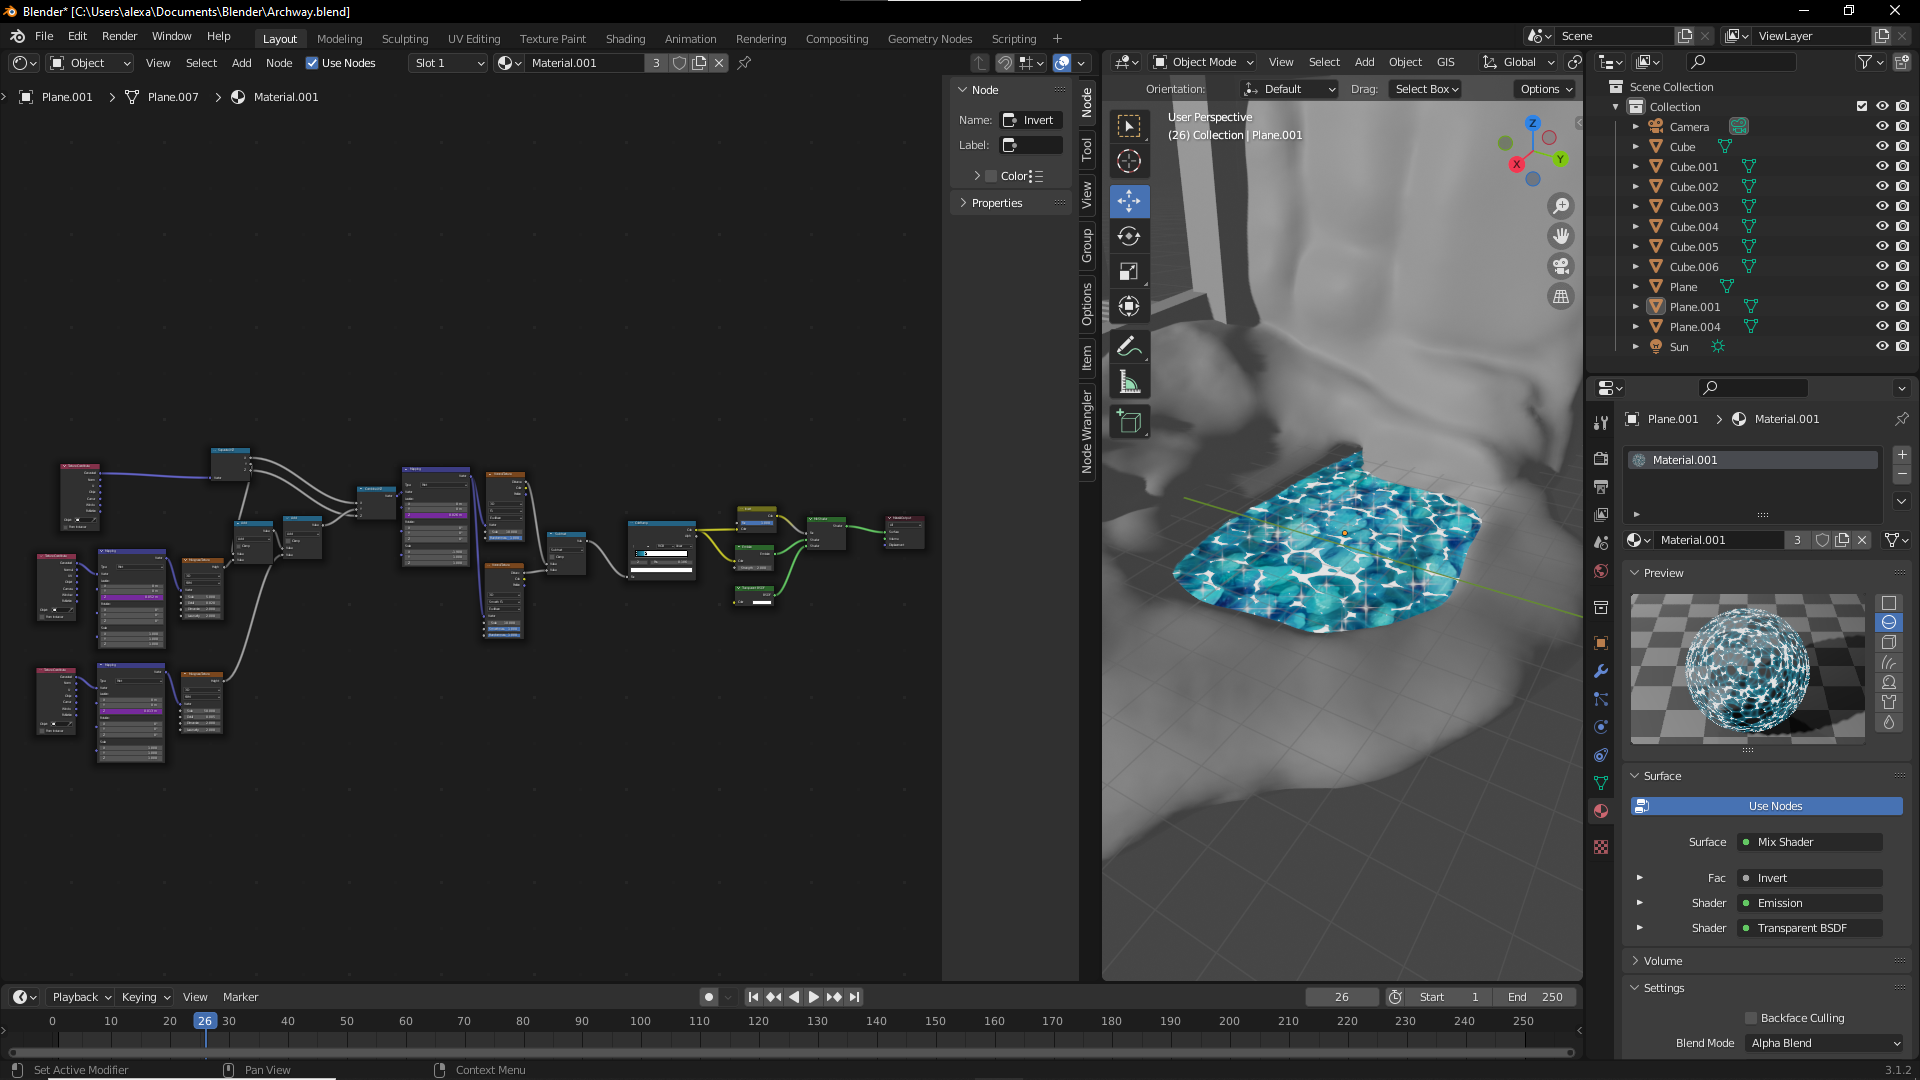
I first started by changing the colour ramp to a colour more akin to a pond, at this point I knew I was going to use an additional layer/plane as this material alone doesn’t have enough depth. As I would make one shade transparent I only had to add the additional colour in between, then I could add a transparent shader and use a mix shader to combine it with the emission and that would make sure only the spume is shown.
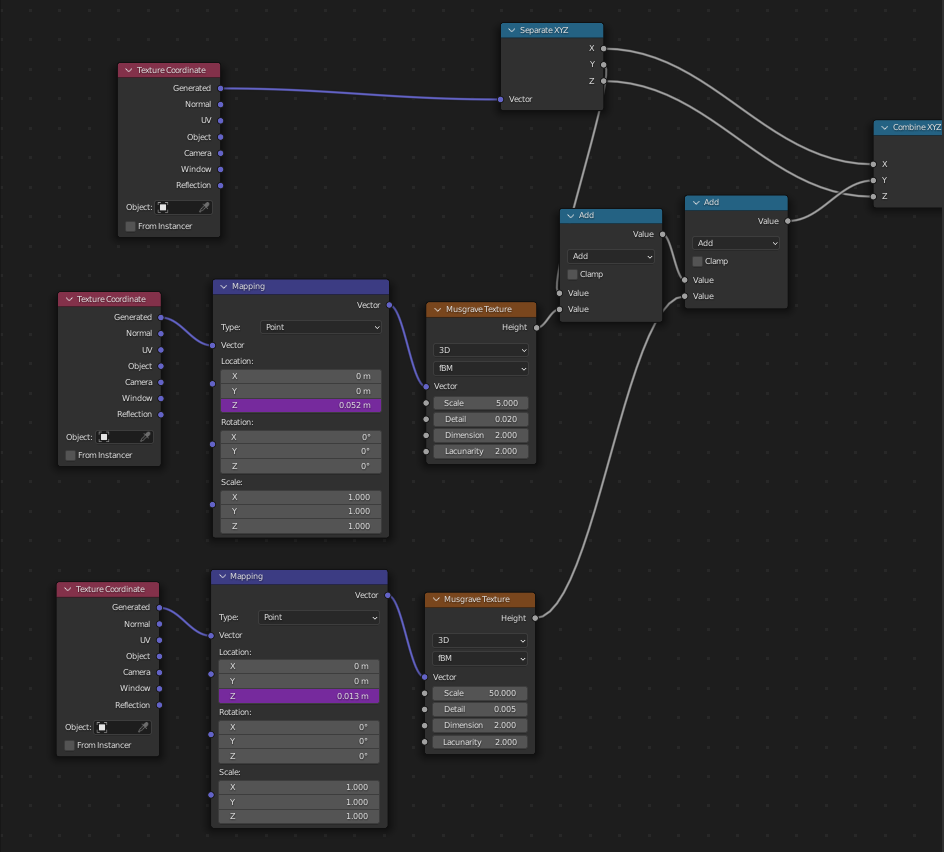
Next, I decided to add some more textures, the current problem I had was that the previously black shapes were too rounded and therefore didn’t give the feeling of a moving body so I decided to try to edit the vector properties of the previous textures in hopes to animate them. This will better represent the motion that would appear in this environment even if just in an image. In this setup, I used Musgrave textures with changing z-axis to evolve the simple Voronoi texture by giving it more life-like water properties.
With this, I would now go on to making a bottom layer for the pond.
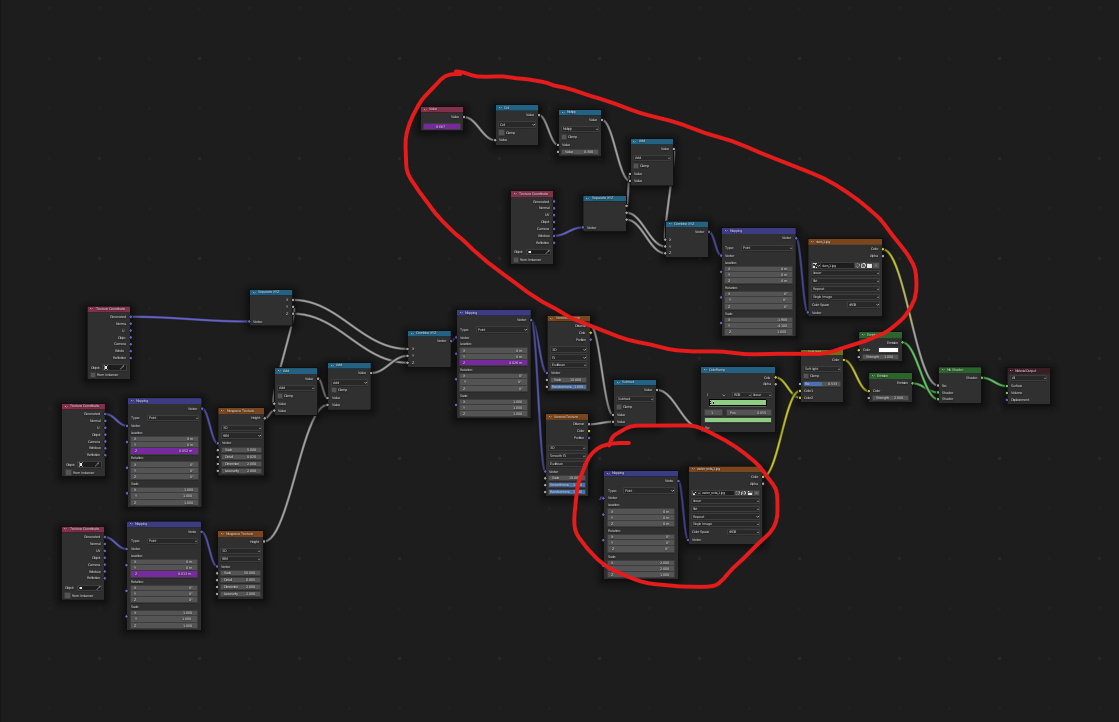
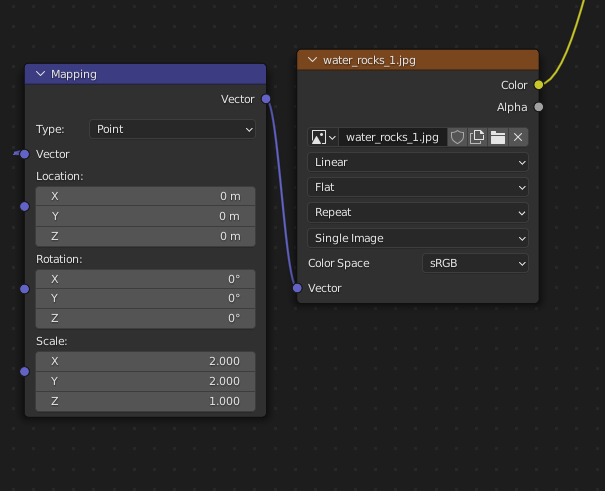
The benthic zone, the bottom layer of the pond, is quite similar in setup to the upper layer, for the most part, there are only two notable changes. The first is the introduction of the rock texture, this is simply a royalty-free image of a rock bed with a texture setup to make sure the sizing is correct.
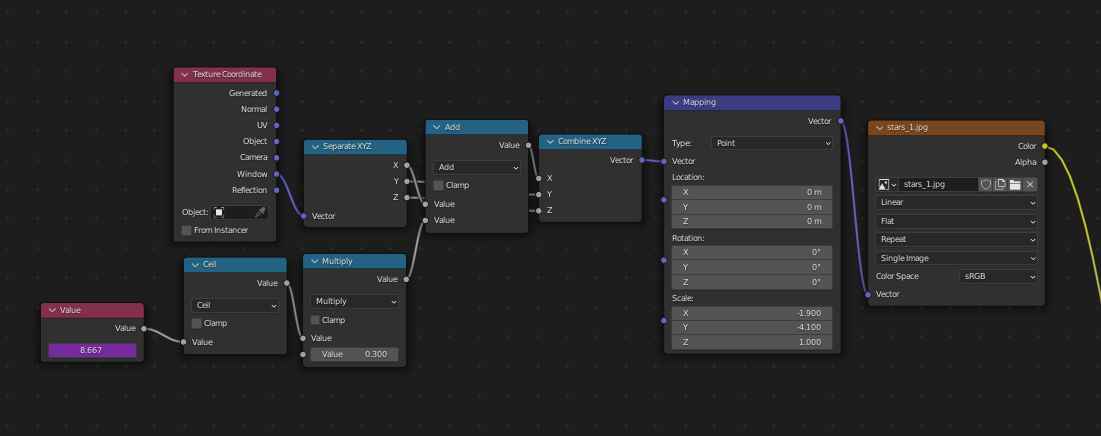
The second is a VFX-style star animation. To complement the style that I was developing I decided to use a technique often seen in animations to simulate sparkling stars. I started with a simple royalty-free image of stars and then through the mapping of the texture I used a combination of math nodes to randomly move the location of the star texture on top of the pond texture. Although the final piece will not take the form of an animation this random movement will help capture the essence of reality with its movement.
With this the pond VFX is complete. As you can see the environment around the pond is still clear so my next objective was to move on to applying some materials to the setting, however before hand, I decided the setting could use some more depth so I expanded on the setting with an additional floating island.
At this point, I would also like to note how my theme ended up evolving from what was formerly just medieval. As I was designing the setting several times I would imagine my scene in colour and with this, the more conventional medieval setting didn’t feel too interesting as they often can involve a quite grounded colour palette, therefore while not completely changing theme from the original proposal I did decide to expand on it and revise it with a more specific name of Traditional Japanese to give a date the Nara period.
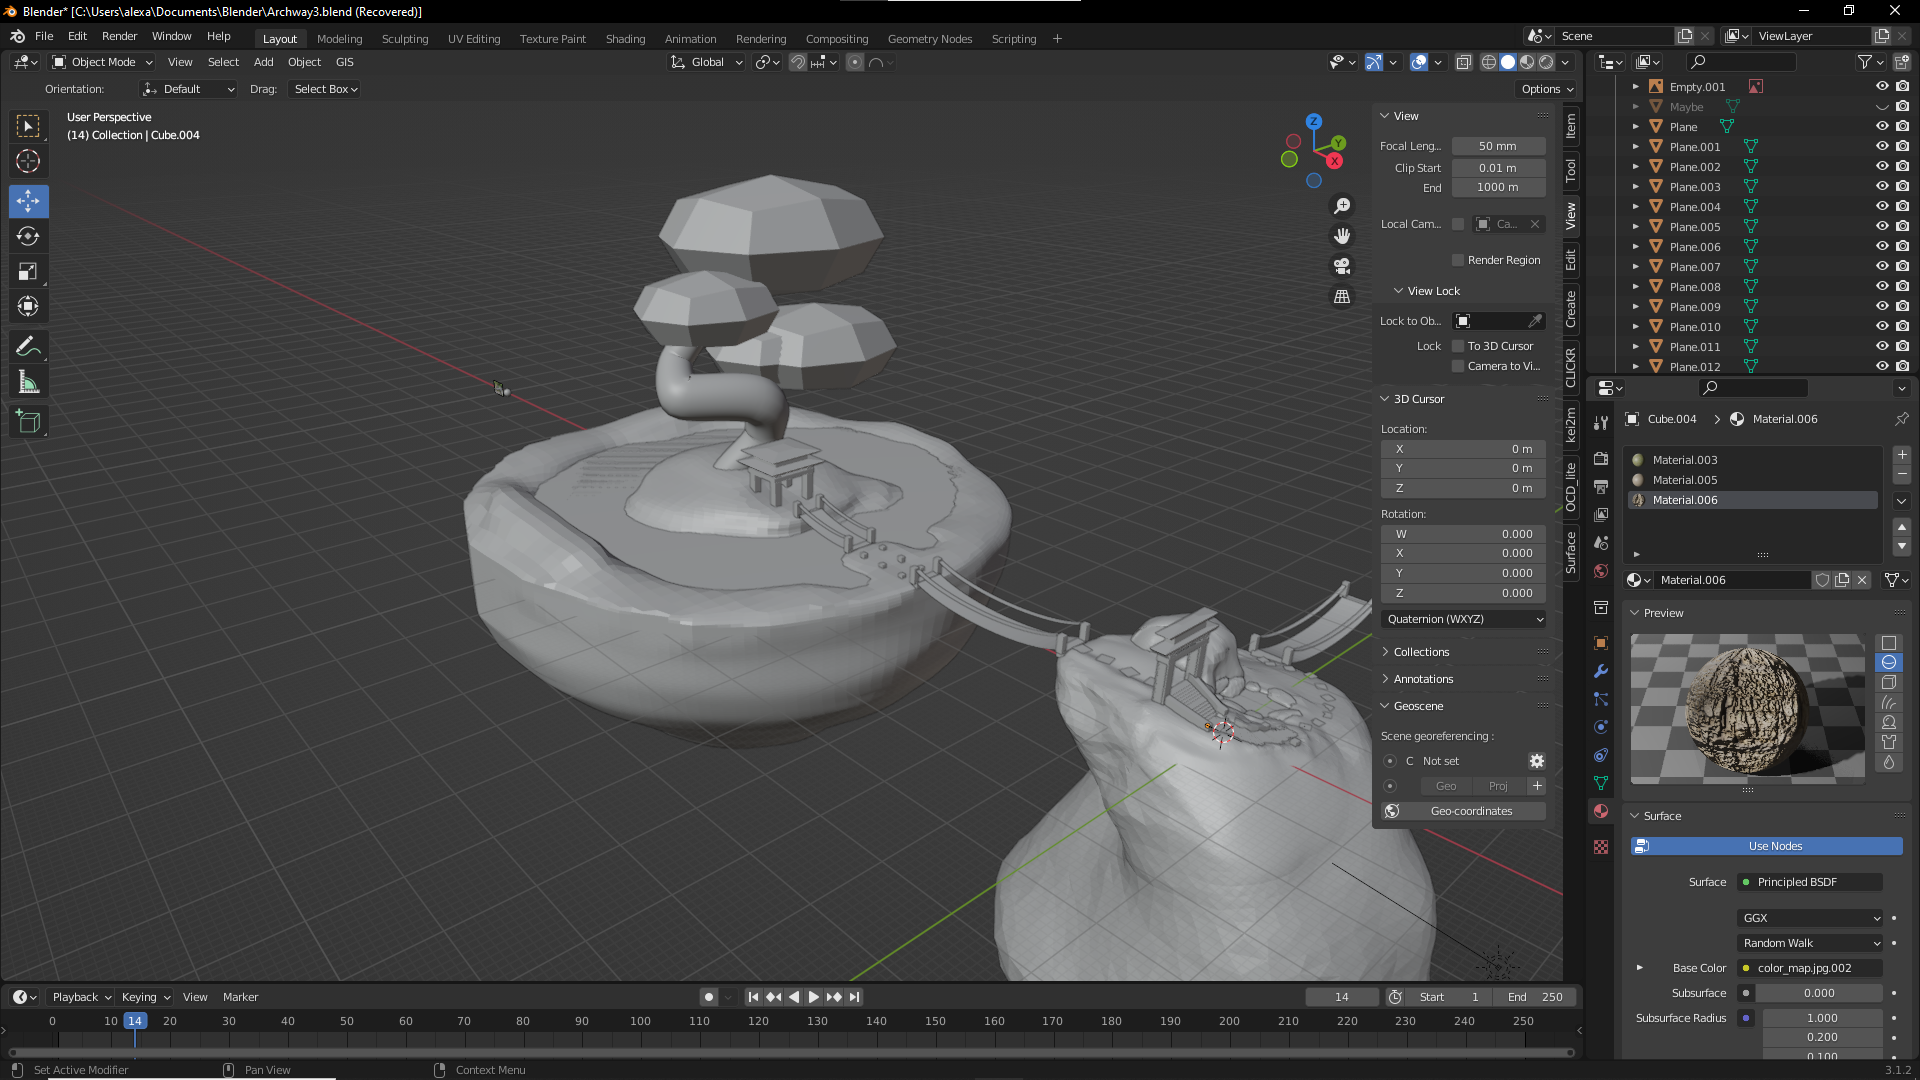
The two areas are connected by a bridge, which I also added to the other side of the first area to imply more happening off-camera. The island contains a small canopy underneath a large blossoming tree, this follows the narrative of my scene the island being the final destination/resting point to the long journey.
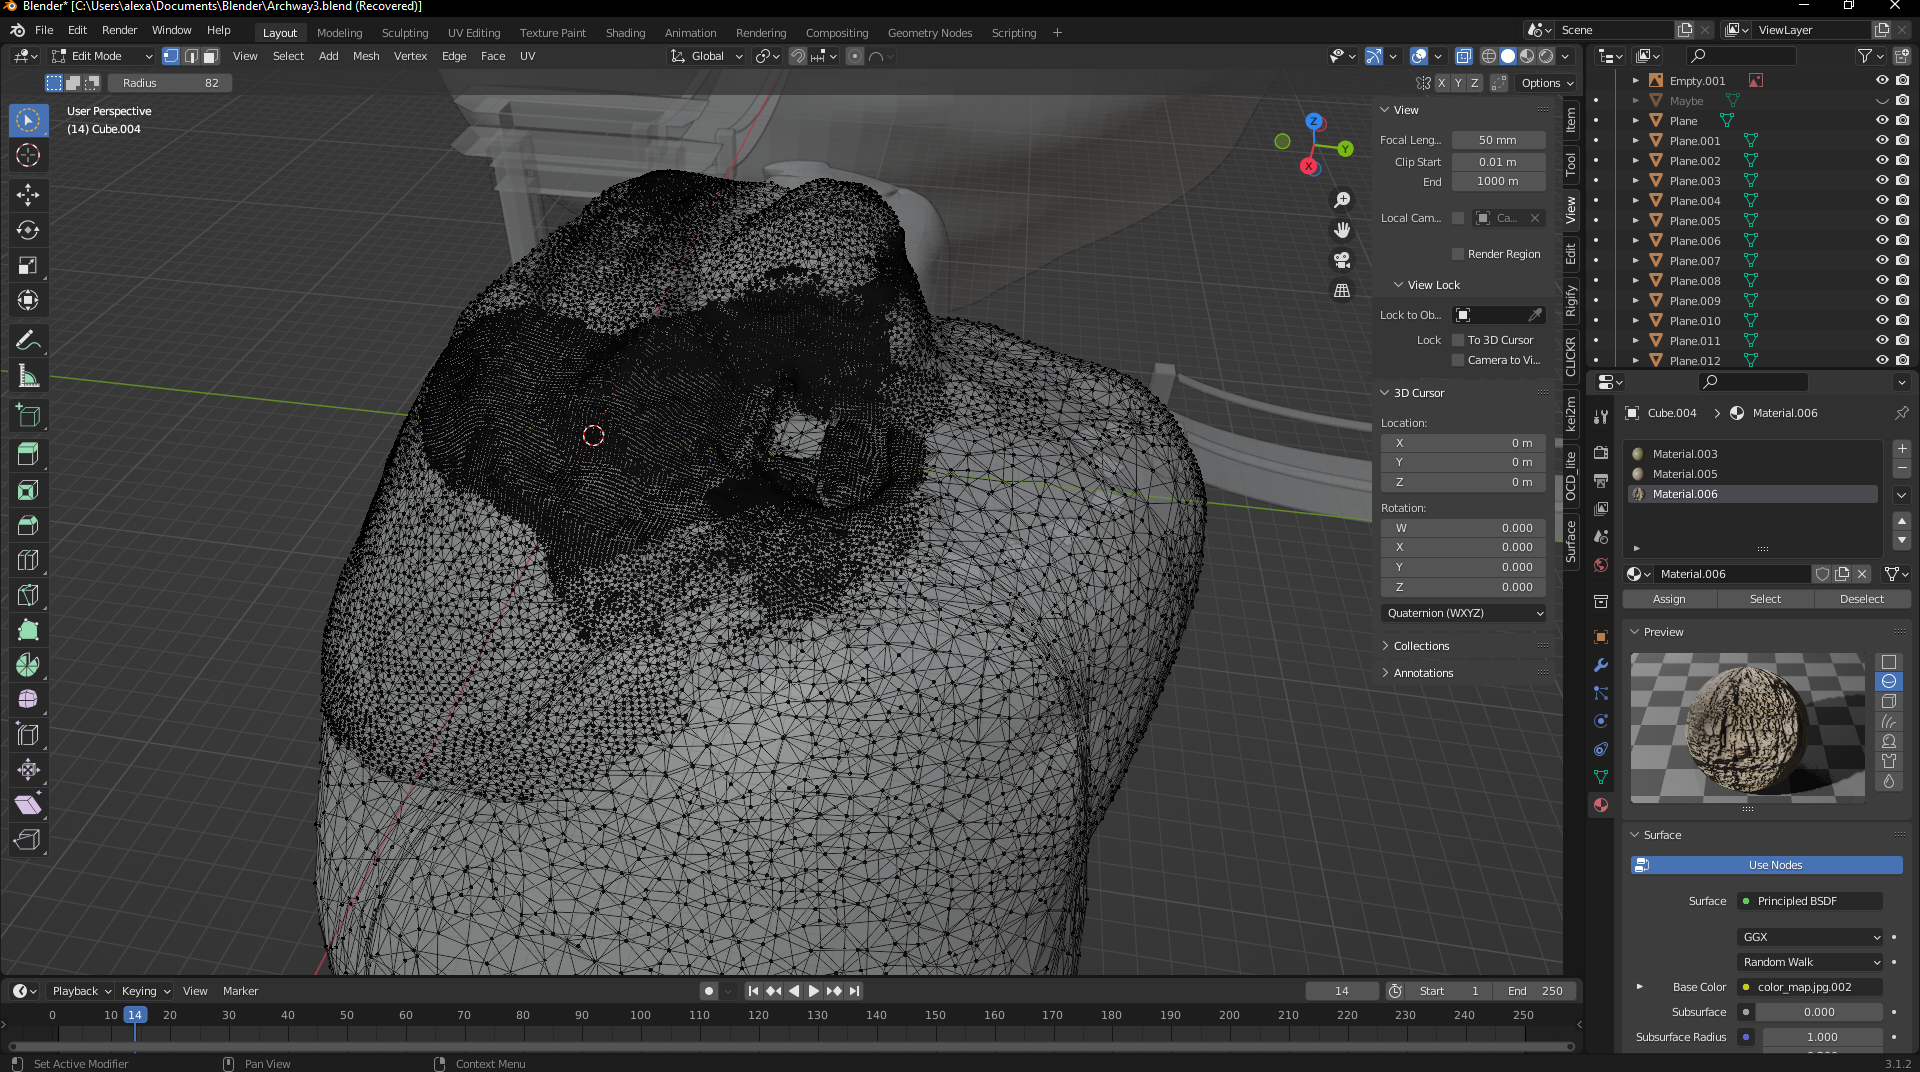
One more thing I would address before moving on to adding materials was the topology of the original setting. Due to using the sculpt mode and Dynamesh the poly count of the area became quite large and ununiform. To fix this I would have to take some time and re-mesh the object. This is a mistake that will cost some time and could have been avoided with different methods such as using the multiresolution modifier, something I will definitely consider going forward and next time.