
The material is just as important as the object itself, in many cases it can even elevate the object, adding colour and life. Without a good collection of materials my scene will fall flat and look lifeless, a circumstance I must avoid in order to capture a compelling photo. Following my timeline I mentioned creating textures (More commonly known as materials in Blender) and this is an important distinction, previously I planned to use free textures and images online in order to create materials however this didn’t feel like enough of a challenge/level of work, therefore, I instead decided to learn how to use shader nodes in Blender, this being my first time properly using them, to create my own unique set of materials. This would add a level of difficulty and allow me to learn a useful tool for future projects.
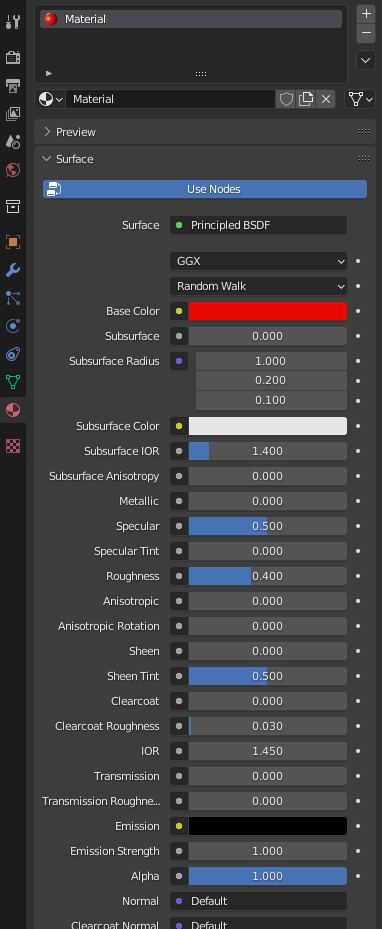
To explain exactly what materials are in Blender, simply put materials are how you add colour to an object in Blender. There are a few different ways of adding colour to an object in Blender, for example when adding a material to an object there are many different options to choose from on the principled BSDF such as colour, roughness, emission and such. From there, you can add more materials with different properties and colours to the object and determine what faces of that object are given each material. This method along with others have various advantages and disadvantages, therefore some consideration is required when picking a method.
My plan for the materials is to use shader nodes to create a unique node setup capable of being utilised in most of my assets, this is no easy task as I have a variety of different assets of different shapes and sizes. The reason for not using the default material properties is due to the lack of options on the shader, by default, it only allows for a single base colour. Although this is the case I would still use a surface shader as, as I will explain next, they do provide benefits when used in conjunction with nodes.
Before creating the first material I did do some thorough experimentation with the node editor to learn the different tools and nodes it provides this would give me the knowledge to better explain the actions I am performing.
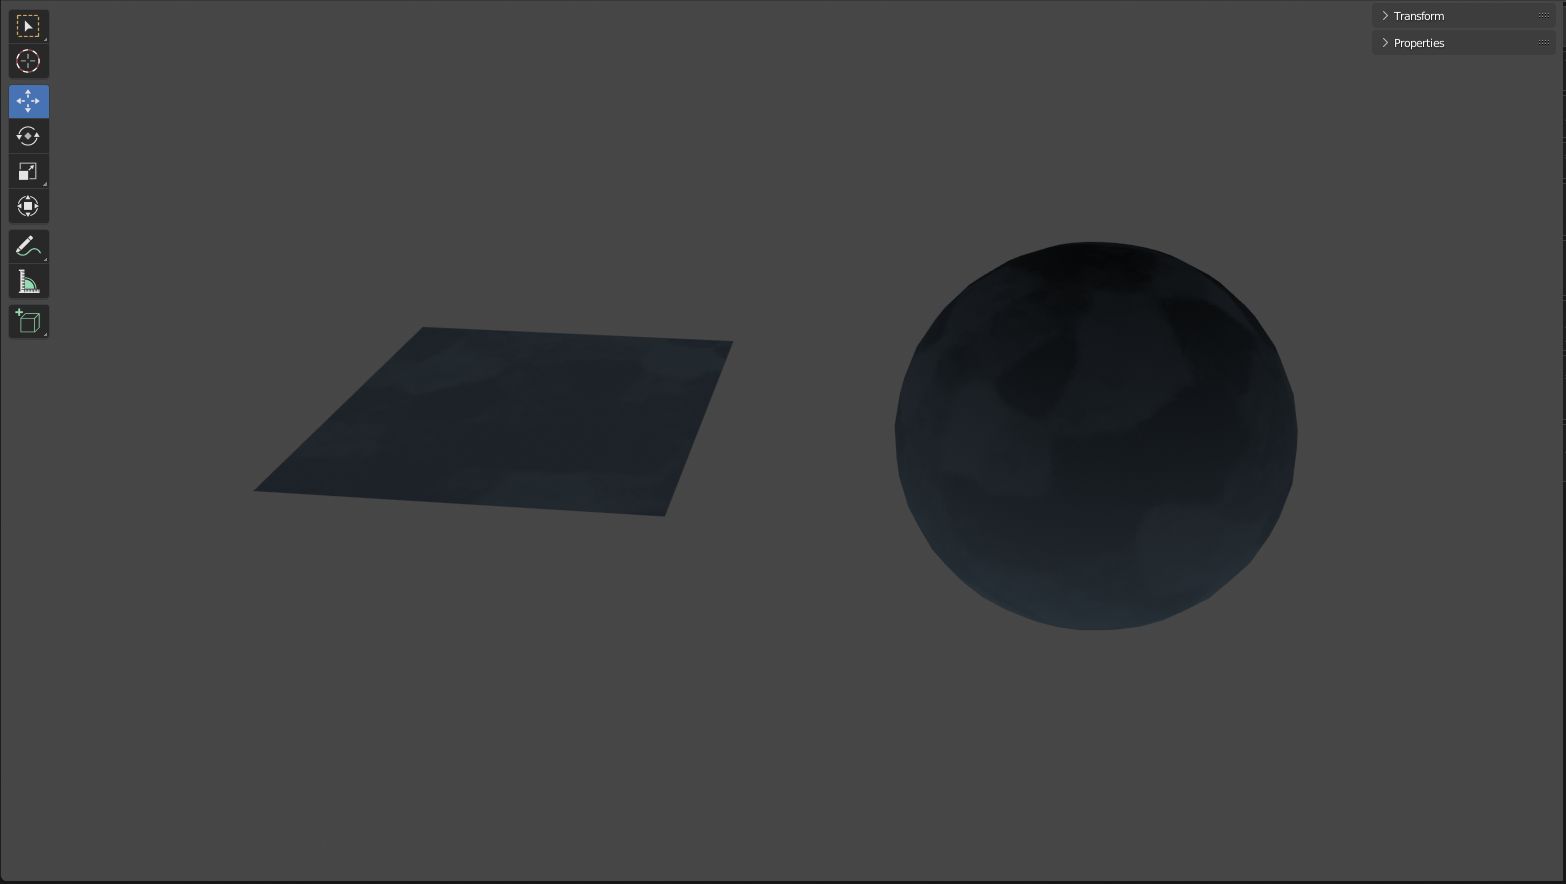
When starting a new material it will look like this –
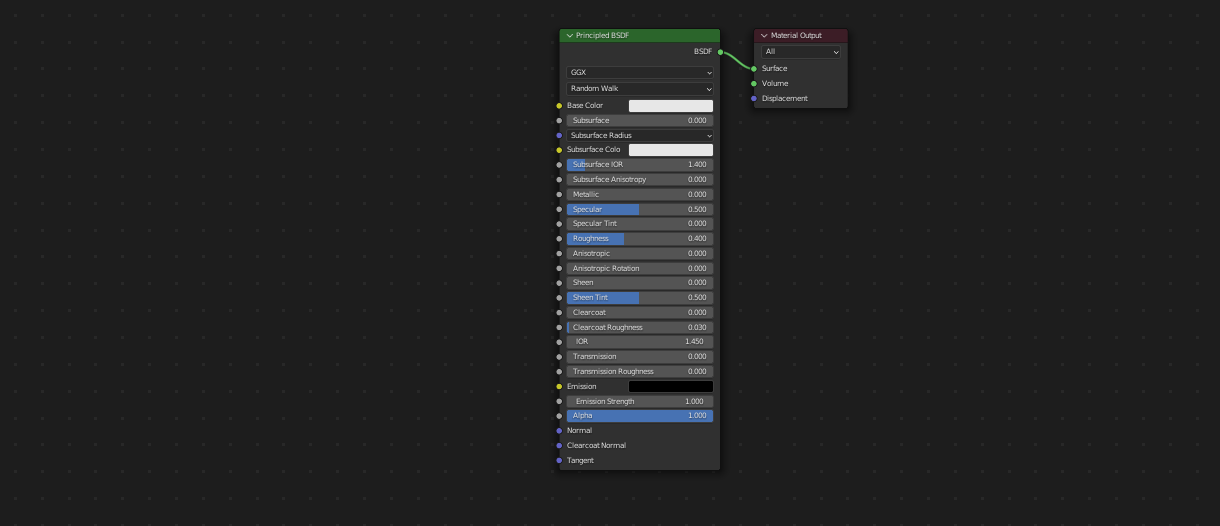
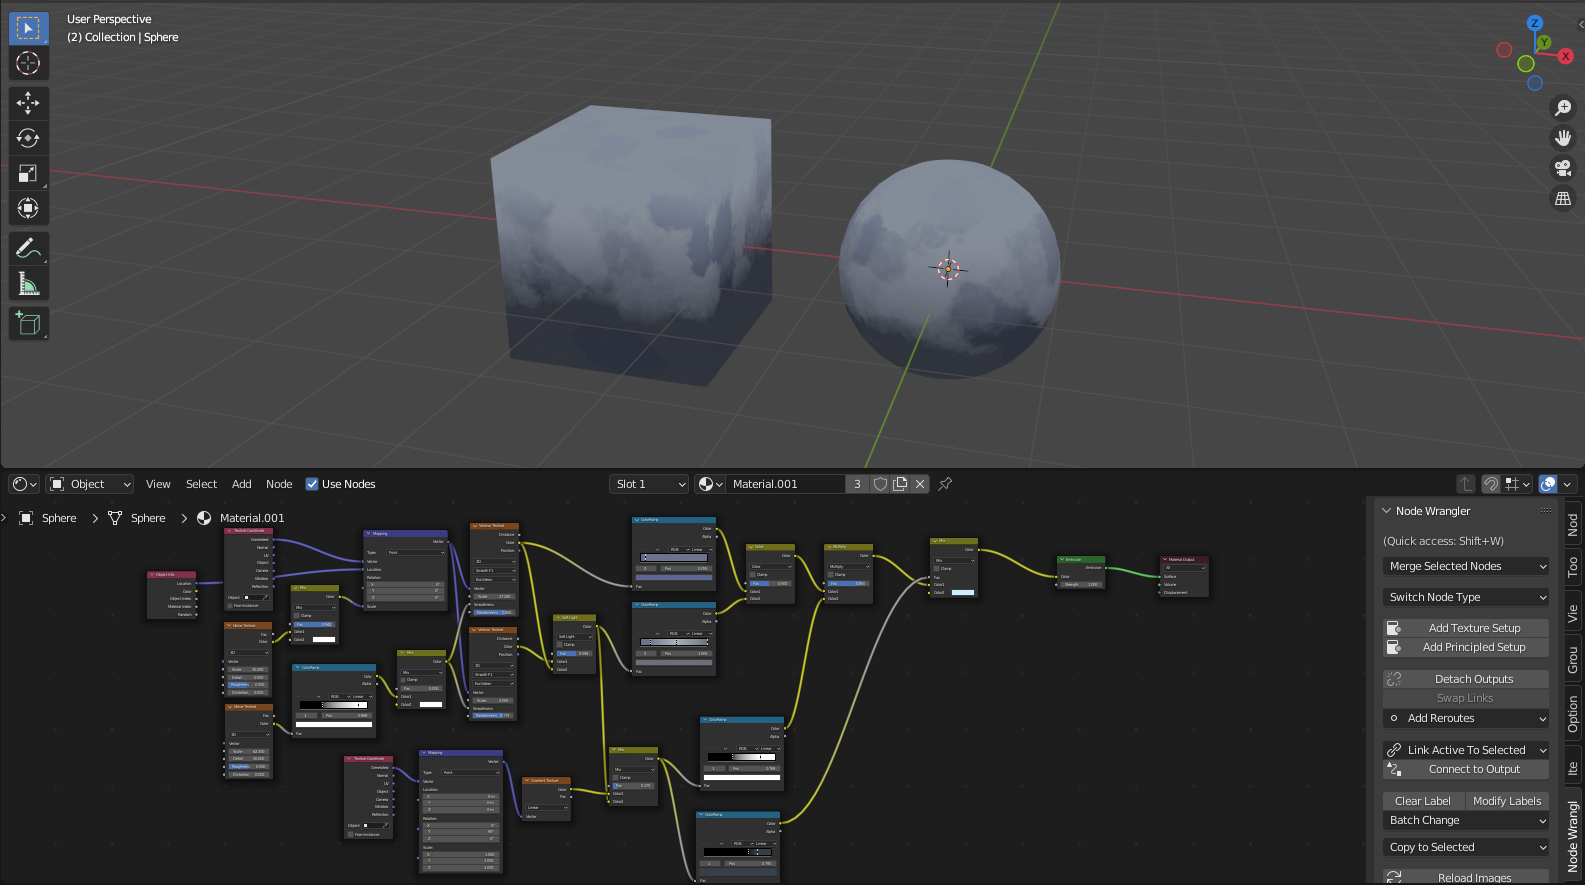
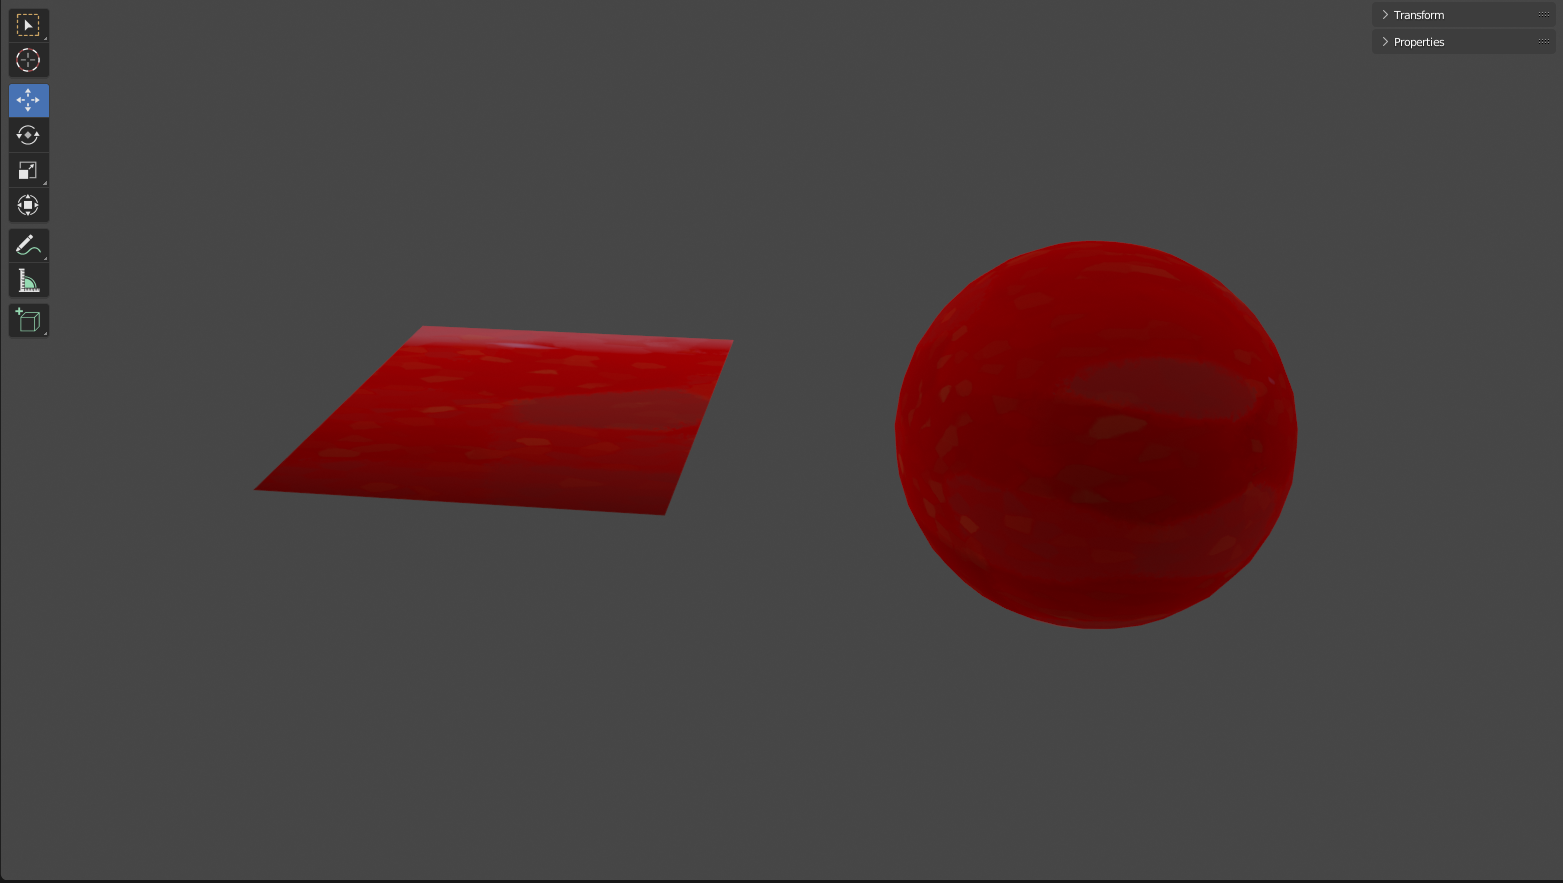
This is simply the default shader, principled BSDF, being outputted onto the surface of the object. The shader has quite a few options but in my case none are very useful, therefore to start I would replace this shader with an emission shader. An emission shader will be useful as it does not use shadows and for the style I’m going for that will be useful. Next would be adding a texture to create a more interesting pattern involving different colours to mimic the texture of the object, for this first material I would be making a stone texture. I chose to use a Voronoi texture as it’s a type of texture that isn’t uniform so doesn’t mess with the viewer’s eyes as much. As I am plugging this node into the emissions colour, it will randomise the colours and I don’t want this therefore I will also add a colour ramp.
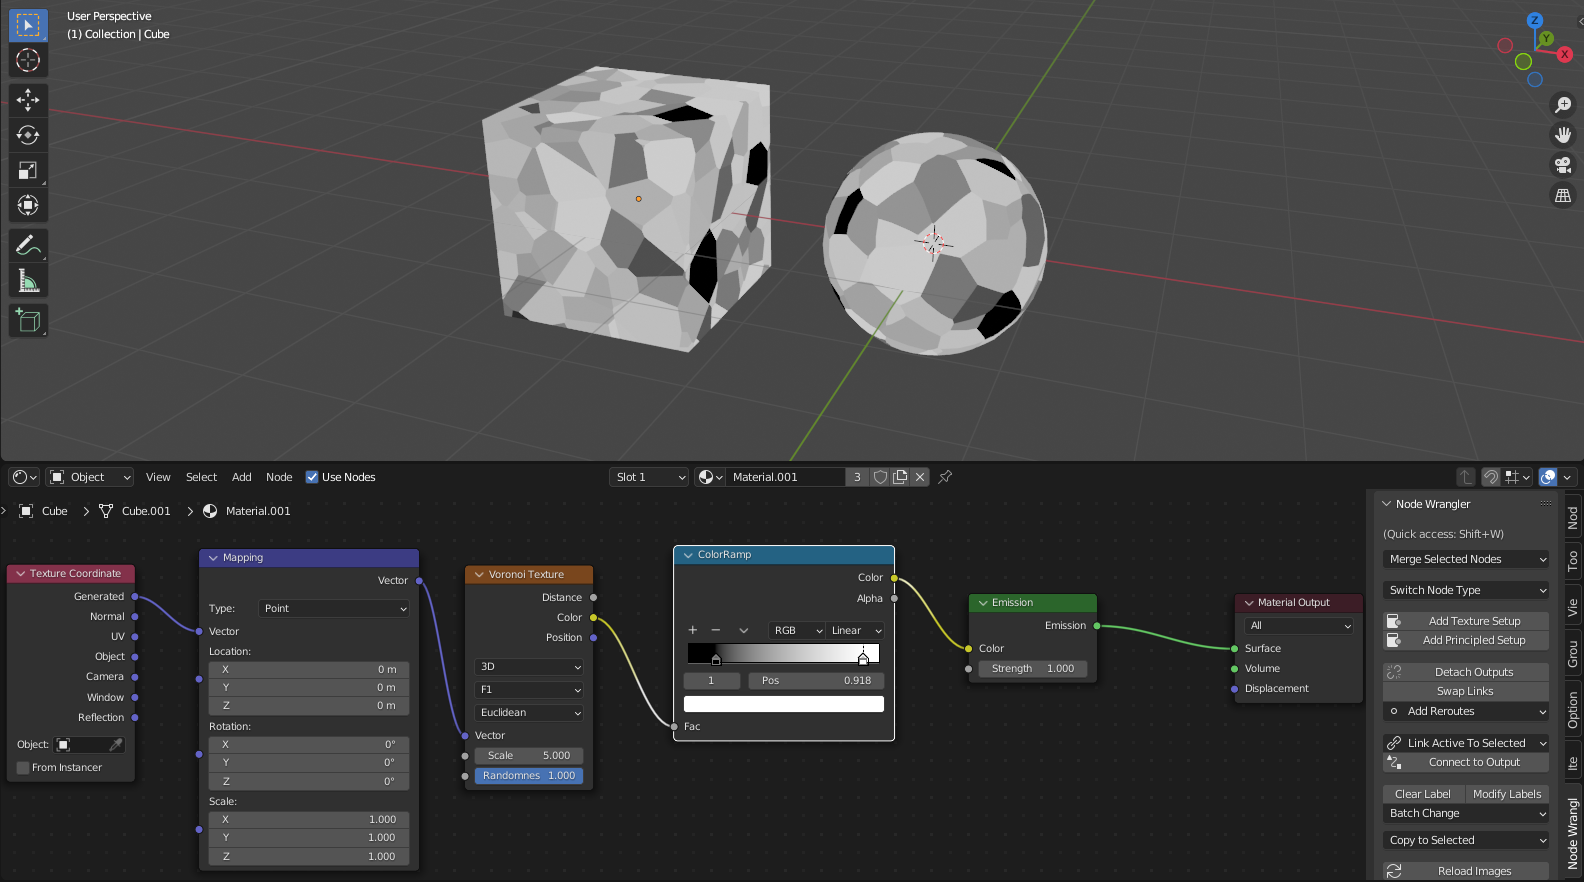
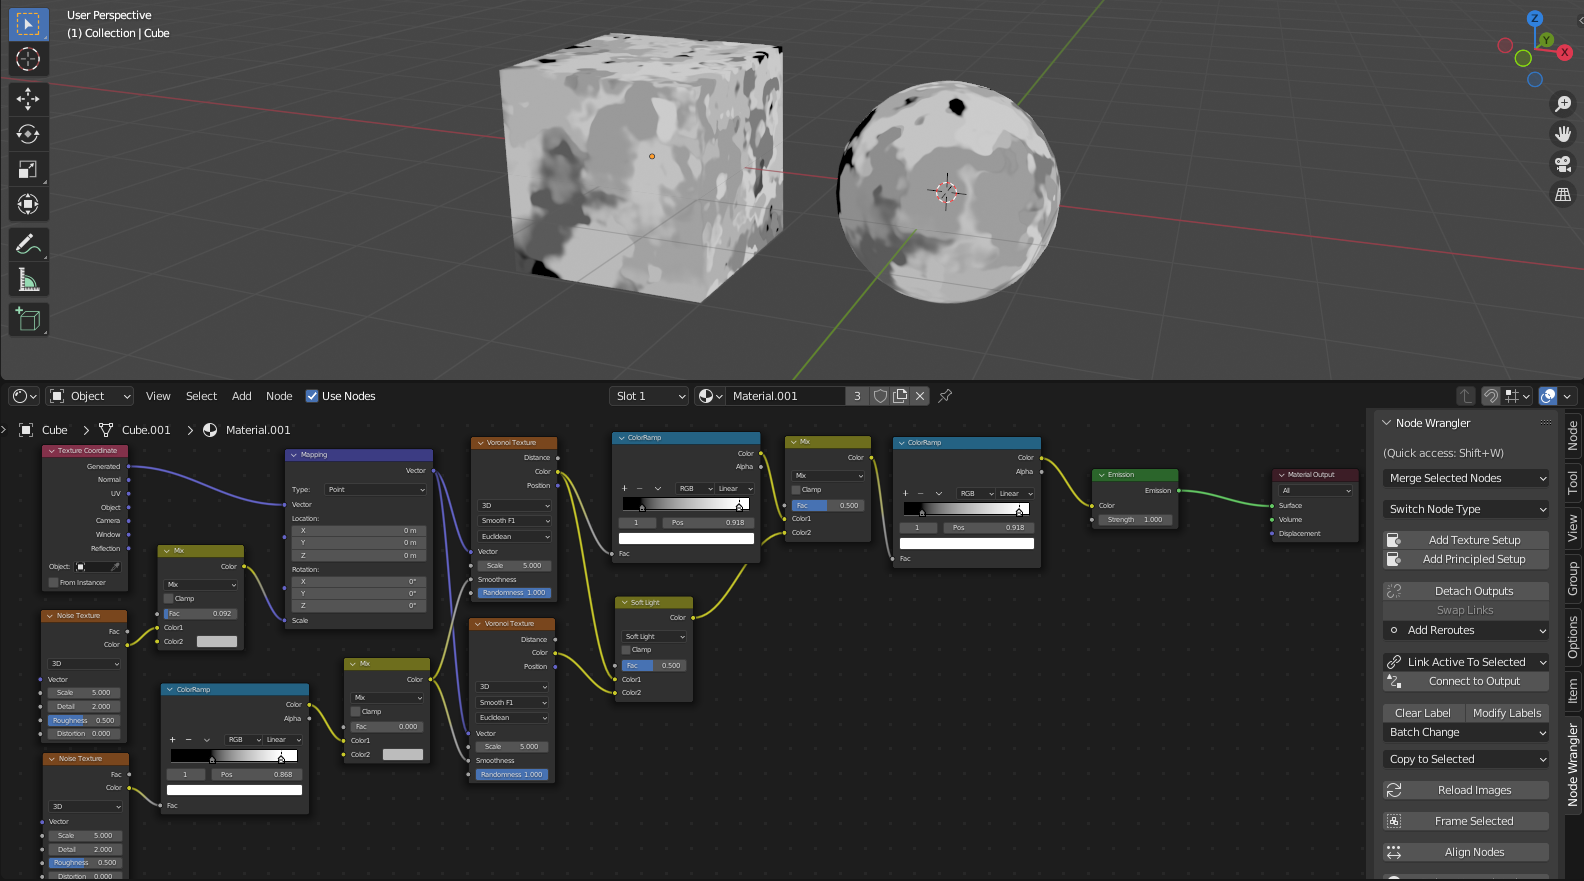
As you can see the edges are quite sharp so to reduce that I would add an additional Voronoi texture and mixRGB with the previous with soft light. To add some sharper tones I also added another colour ramp and combined that with the mixRGB. Even after this, the look I was going for was not there, I wanted to have a texture akin to watercolours and to do so I added some noise textures to alter the mapping values of the Voronoi textures (and after I also added textures to do similar on the smoothness) this will randomise the scale of the texture in a way that would deform the shapes involved.
At this point I arrived at the shape I wanted so I would move on to the colours now. First I could change the colour values of the colour ramps as those are the majority of inputted colours, for this material as stated previously it would be a rock so to fit my setting I went with a bluish pond rock. Along with the colour changes I also tried tweaking some of the values such as on the textures.

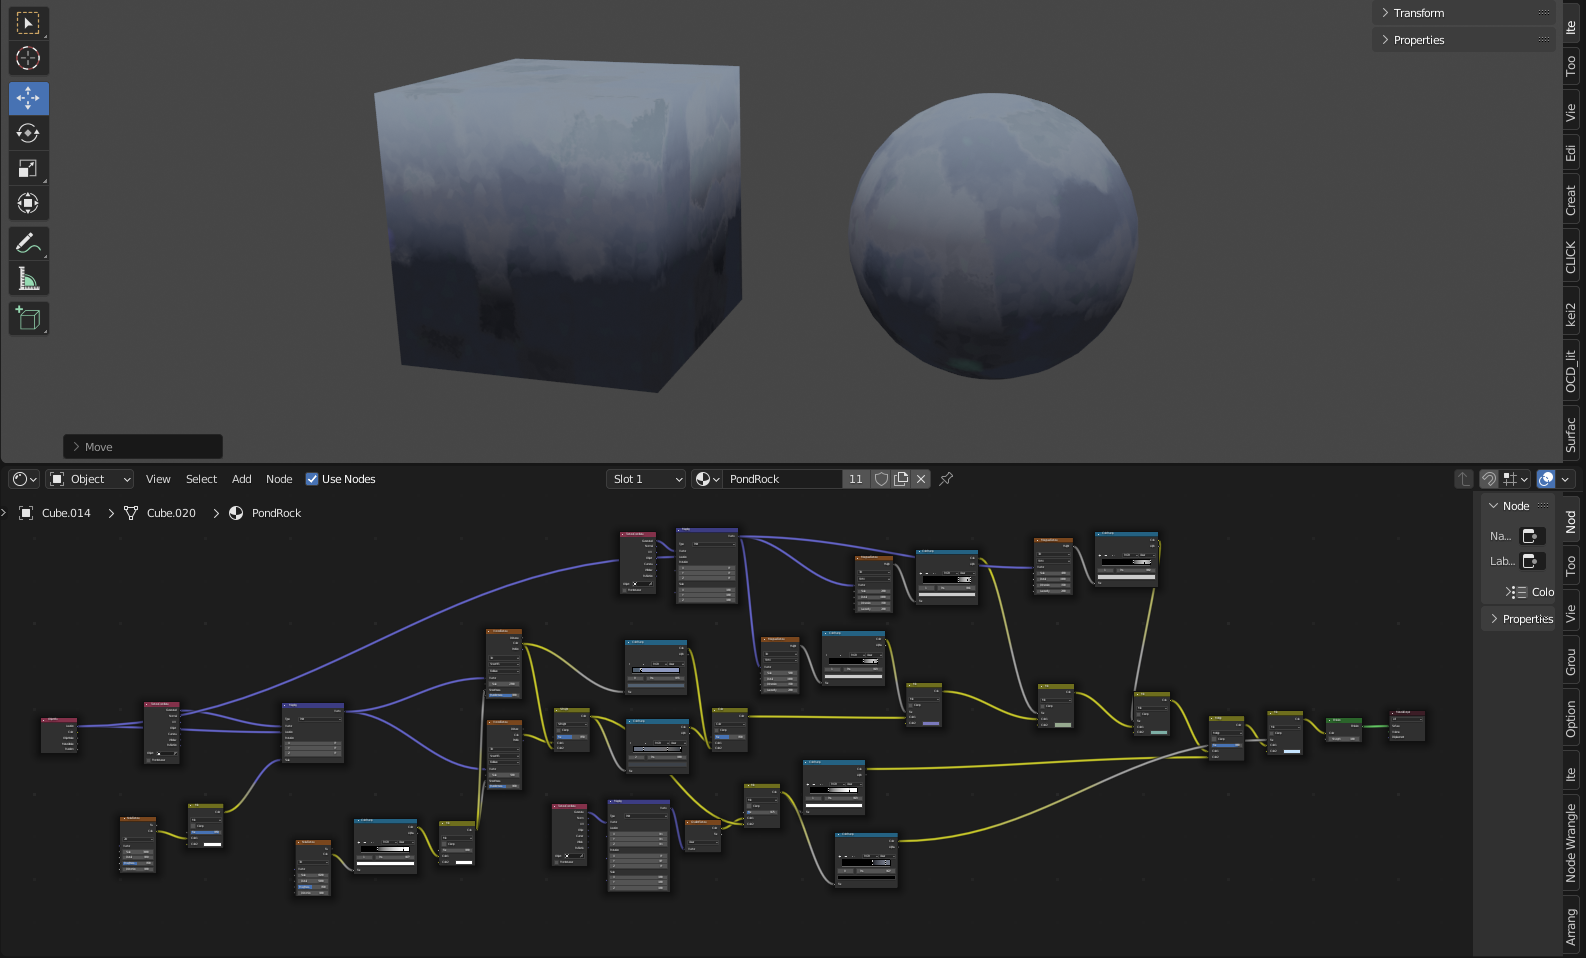
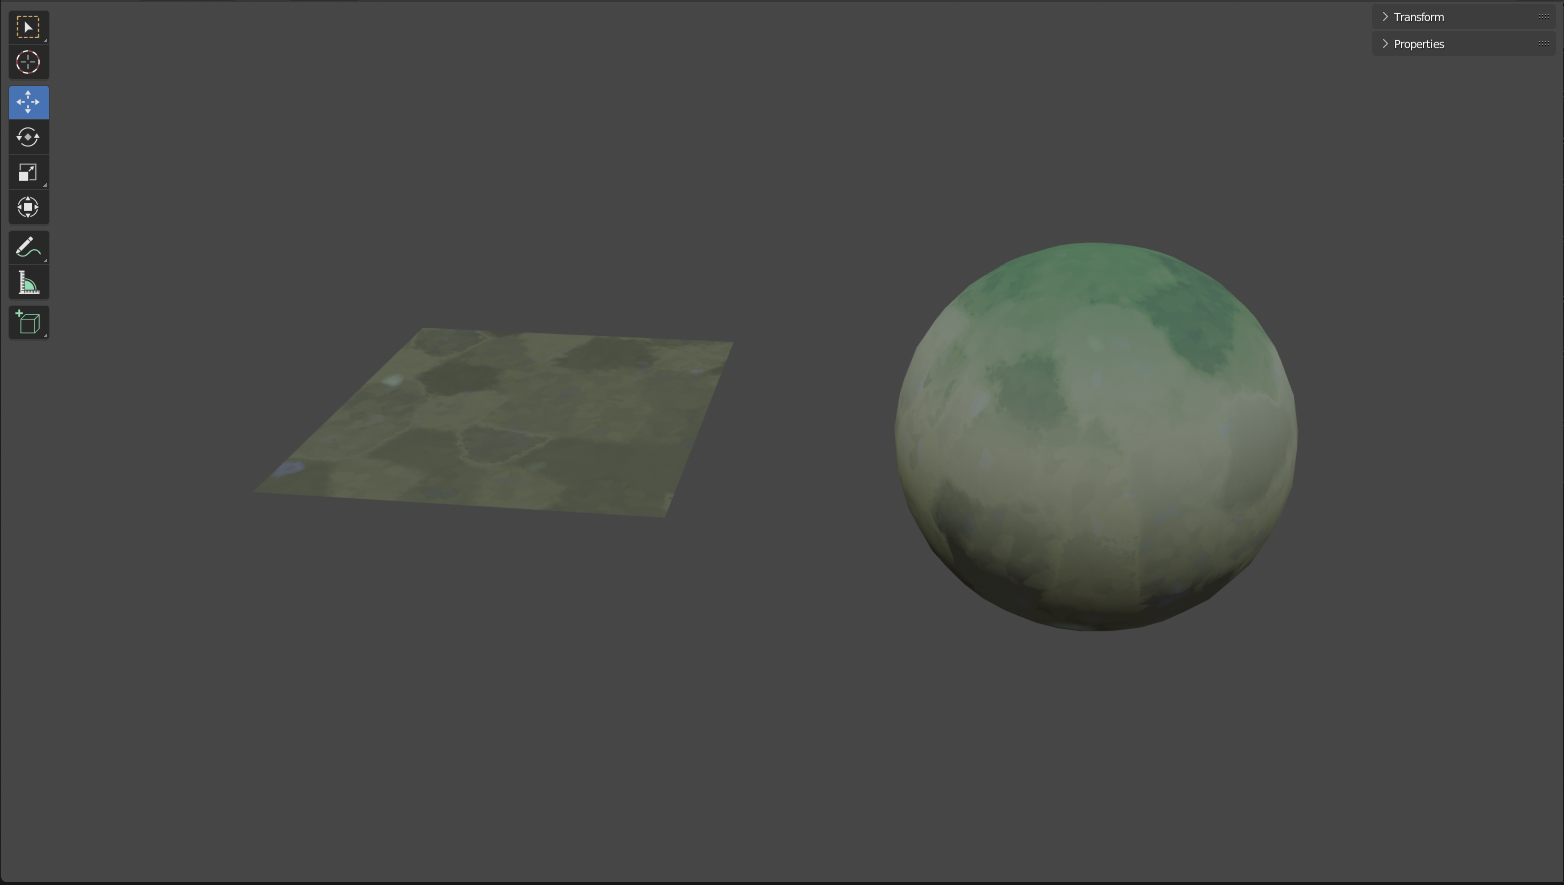
This was a clear improvement for me but I wanted to create some illusion of light as the material felt too bold. To do so I added a gradient texture and colour ramps, these would give the look of light and shadow from the top and bottom of the object. With some further tweaking, as is necessary with node setups, I could call the material done.
One final thing I would do is include an object info node and plug it into the original texture mapping location, this would make it so the texture changes depending on where it is in the scene, this is useful as it stops objects from looking the same which would take away from the aesthetic of the scene.
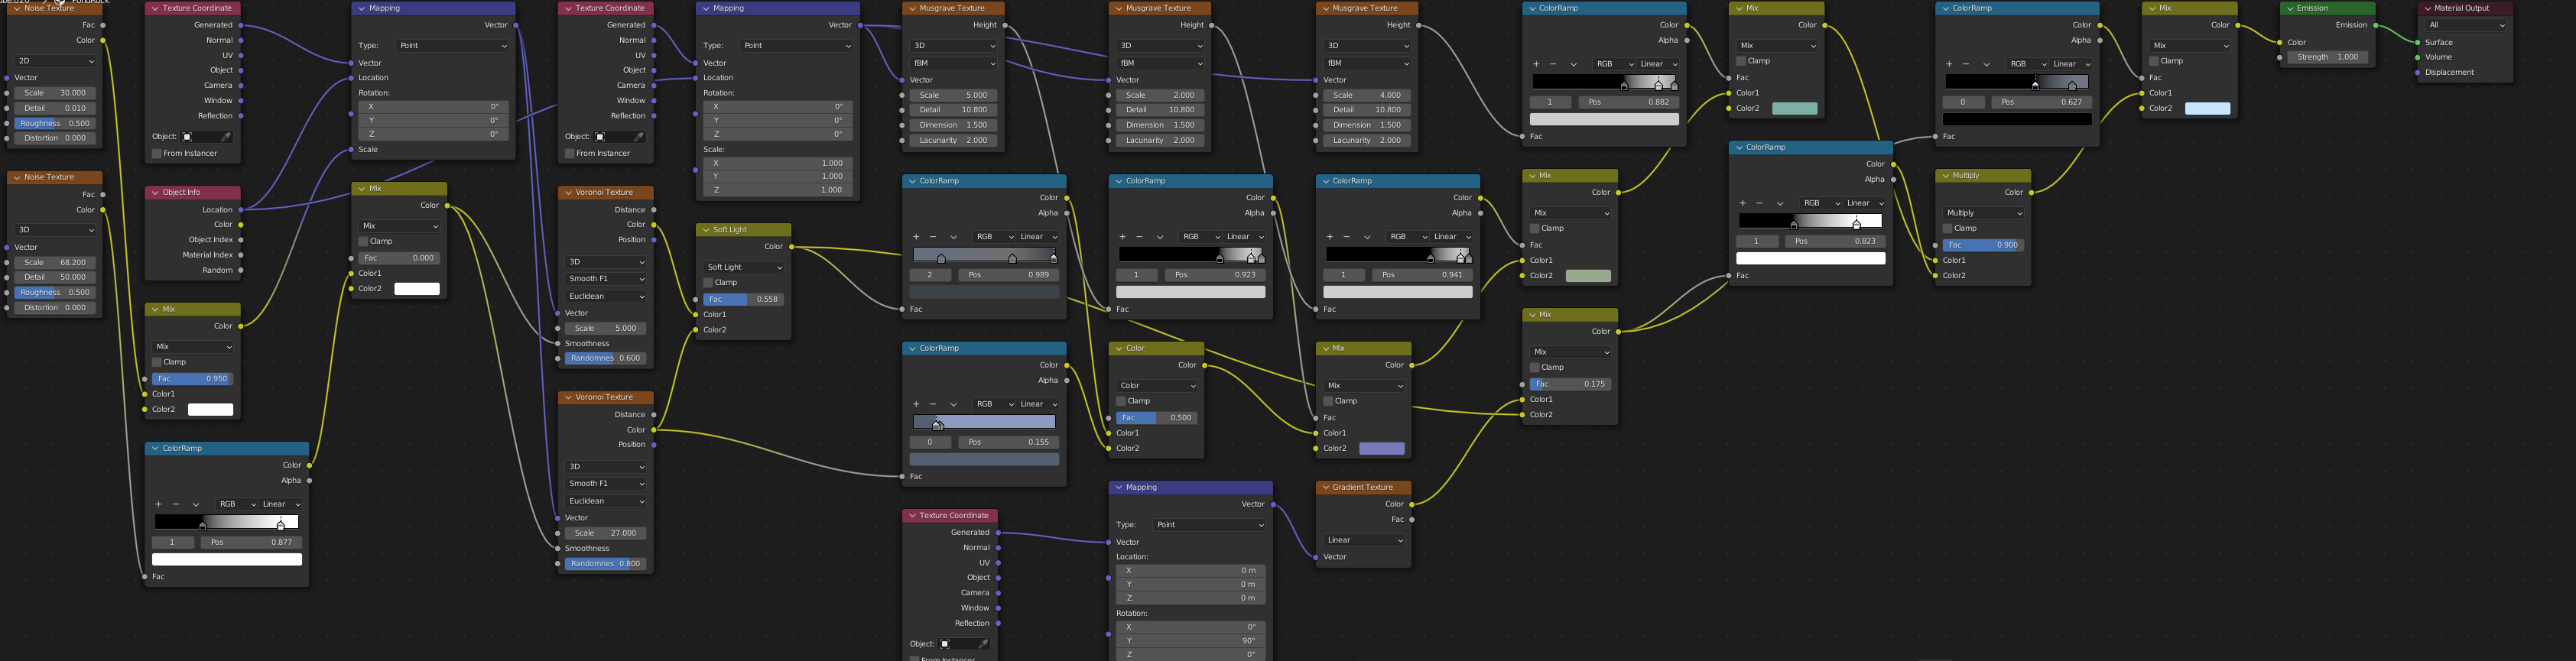
Although acceptable I did eventually come back and add some further detail to the material. As I mentioned earlier I was going for a watercolours look and I decided to add some more texture nodes with colour ramps to give the look of random paint splotches. I used Musgrave textures and combined them with the rest of the nodes at the end of the line so as to not mess with earlier textures. These imperfections would help create a more lifelike scene.

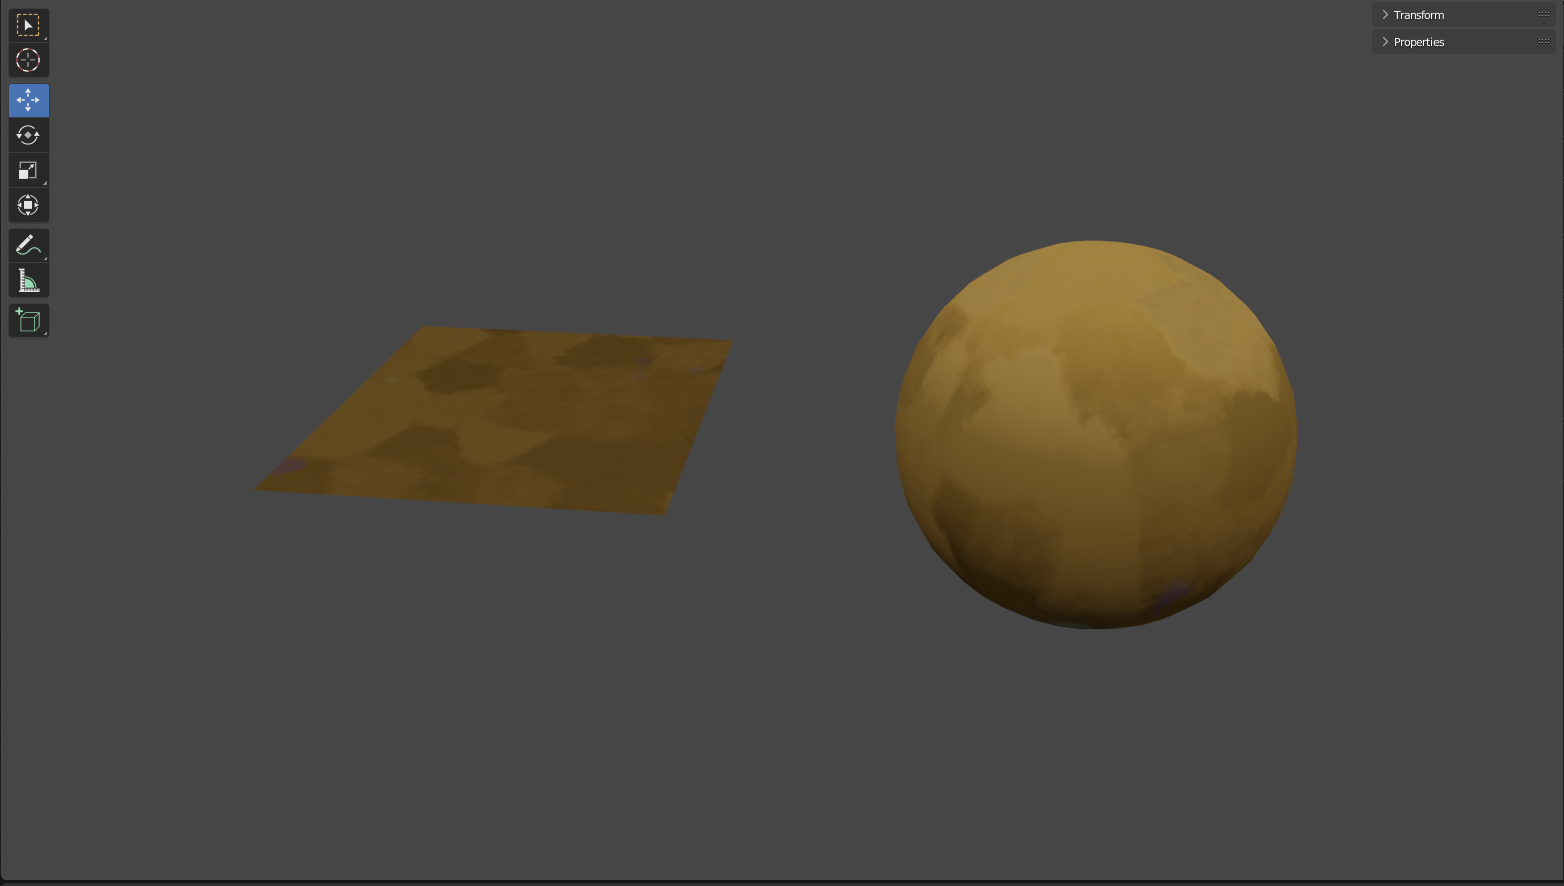
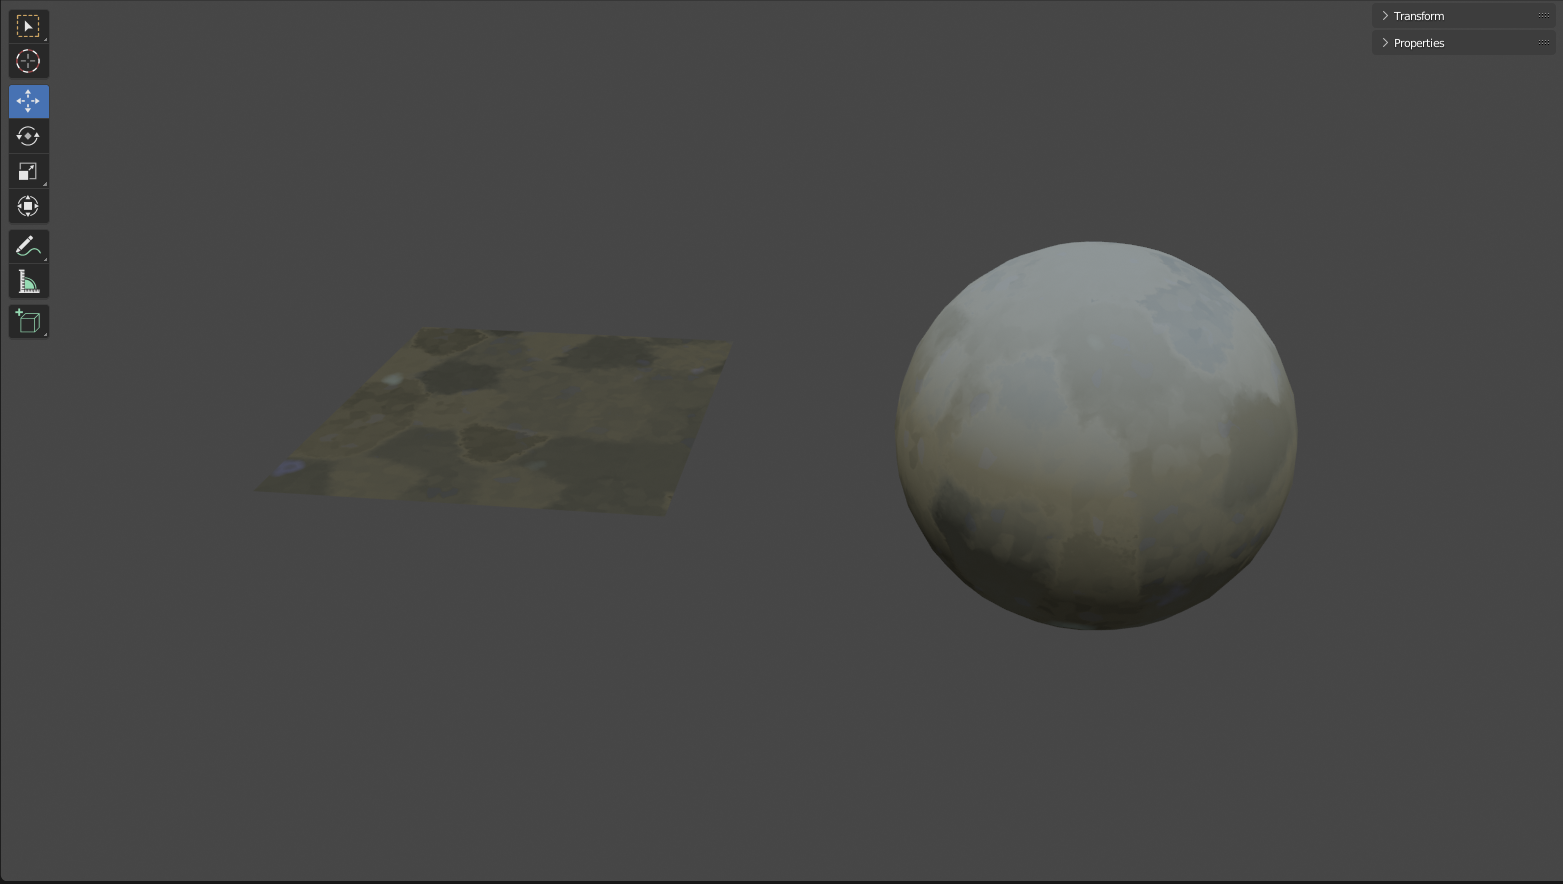
Below I’ve included more of the materials I created for the scene using the same process.

Pingback: Developing the Setting – Alex Aluko